How to Create an Explainer Video for Your Product: What It Is and Why It Works
If you’re trying to figure out how to create an explainer video for your product without hiring a production agency or learning a complicated editing tool, you’re in the right place. An explainer video is one of the fastest ways to turn a confusing product page into something people actually understand — and buy. In the next few minutes, you’ll walk through the exact steps, from scripting to publishing, that turn a blank page into a video your customers will actually watch.
Table of Contents
What Is an Explainer Video, and Why Does Your Product Need One?
An explainer video is a short video — usually 60 to 120 seconds — that walks a viewer through what your product does, who it’s for, and why it’s worth their time. Instead of asking someone to read three paragraphs on your landing page, you hand them a video that does the explaining for you.
Here’s why it matters: most people would rather watch a short video than read long text to understand a new product. A good explainer video reduces confusion, builds trust faster than text alone, and gives visitors a reason to stay on your page longer — which search engines notice too.
If your product is even slightly technical, abstract, or easy to misunderstand (software, an app, a subscription service, a tool with multiple features), an explainer video isn’t a nice-to-have. It’s often the single highest-converting asset on your page.
For a broader look at how explainer videos fit into a wider video marketing strategy, see Wistia’s guide to explainer videos.

Step 1: Define Your Goal and Know Your Audience
Before you write a single word of script, decide what you want the video to do. Common goals include:
- Getting a visitor to sign up for a free trial
- Helping a confused prospect understand what your product actually does
- Reducing support questions by showing how a feature works
- Warming up cold traffic from ads or social media
Pick one goal. Trying to do everything in 90 seconds is how explainer videos end up long, cluttered, and ignored.
Next, get specific about who’s watching. Are they complete beginners who’ve never heard of your category of product? Or are they comparing you against two competitors already? The tone, vocabulary, and pacing of your script should match that person, not a generic “everyone.”
Step 2: Write a Script That Sells the Benefit, Not the Feature
Your script is the backbone of the entire video — get this right and everything else (visuals, voiceover, editing) becomes much easier.
A script that converts usually follows this structure:
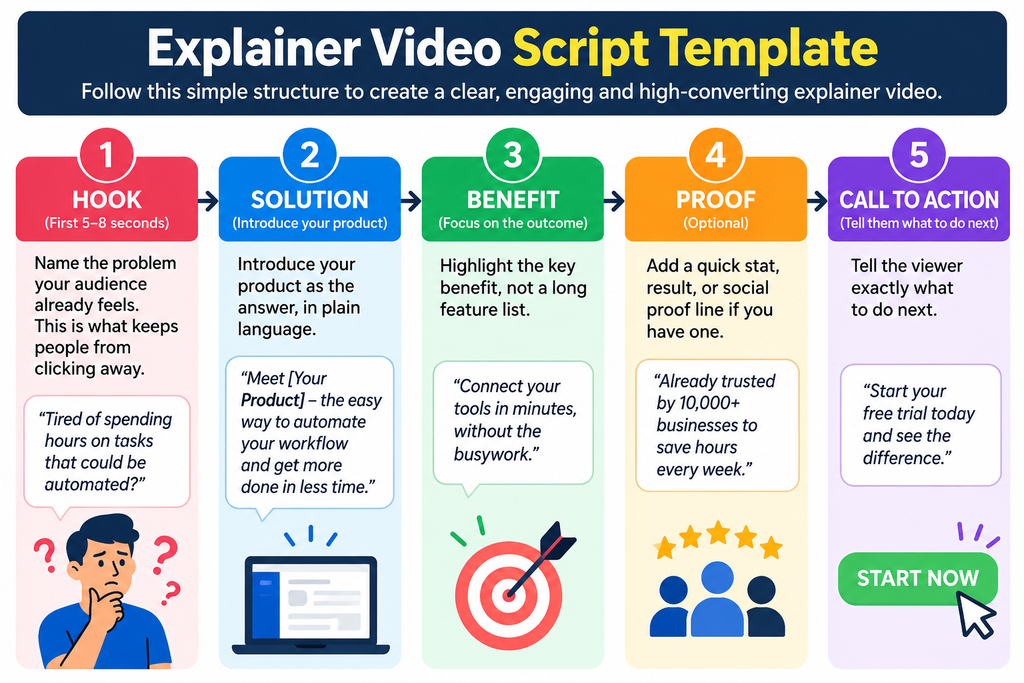
- The hook (first 5–8 seconds): Name the problem your audience already feels. This is what keeps people from clicking away.
- The solution: Introduce your product as the answer, in plain language.
- The benefit, not the feature list: Don’t say “our software has 12 integrations.” Say “connect your tools in minutes, without the busywork.”
- Proof (optional): A quick stat, result, or social proof line if you have one.
- The call to action: Tell the viewer exactly what to do next — “Start your free trial,” “Book a demo,” “Try it free today.”
Keep it tight. At a natural speaking pace, about 130–150 words gets you close to a 60-second video. Read your script out loud before moving on — if you stumble over a sentence, your viewer will too.
Step 3: Choose the Right Explainer Video Style
There’s no single “best” style — the right one depends on your product, budget, and brand. The most common options:
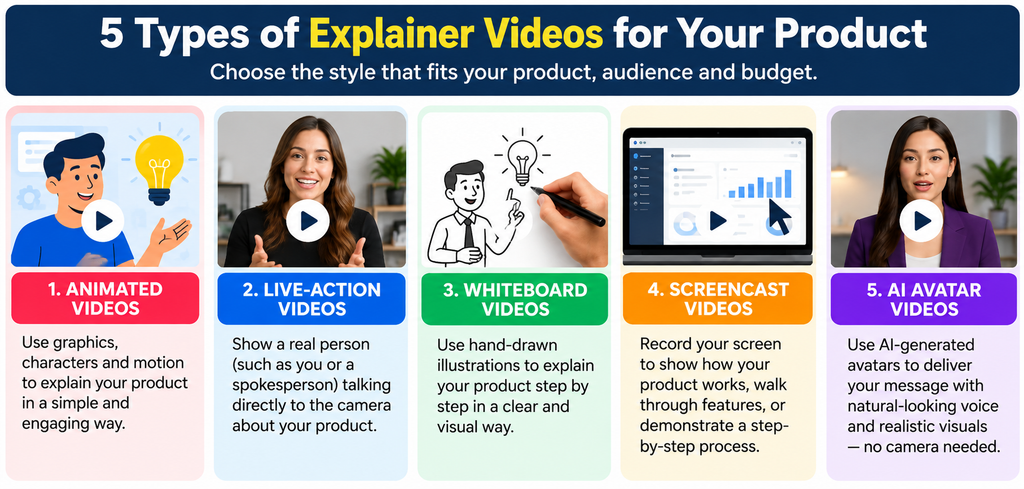
- Animated explainer videos: Flexible, easy to update, and great for abstract products like software or services that are hard to film.
- Live-action videos: Real people, real product, real environment. Builds trust fast but costs more if you’re hiring talent and a crew.
- Whiteboard/doodle videos: A hand appears to draw out the explanation. Works well for educational or process-heavy explanations.
- Screencast/product demo videos: Literally shows your software or app on screen. Ideal for SaaS products where the interface is the selling point.
- AI-generated videos: Built using AI avatars, AI-animated scenes, or script-to-video tools. The fastest and cheapest way to get a polished result without a camera, actors, or editing skills — more on this in Step 5.
If you’re not sure which to pick, look at how your product is best understood. If people need to see the actual interface, go screencast. If your product is a service or concept, animation or an AI-generated video usually explains it more clearly than live footage.
Step 4: Storyboard Your Video Before You Create Anything
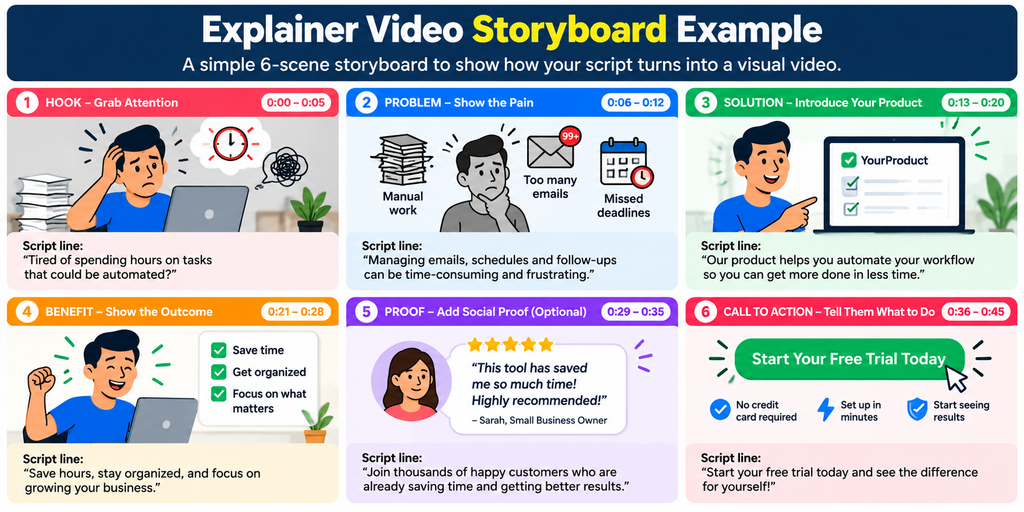
A storyboard is just a simple, scene-by-scene sketch of what happens on screen while each line of your script plays. It doesn’t need to be artistic — stick figures and boxes are fine.
Go through your script line by line and jot down:
- What’s shown on screen during that line
- Any text or captions that appear
- Where a transition or scene change happens
This step catches problems early. It’s much cheaper to fix a confusing sequence on paper than after you’ve already recorded or animated it.
Step 5: Create Your Visuals — DIY, Hire Out, or Use AI
You’ve got three realistic paths here:
- DIY with design/editing software: Works if you’re comfortable with tools like Canva or basic video editors, and you have time to spare.
- Hire a freelancer or agency: Usually the highest quality and highest cost, with turnaround measured in days or weeks.
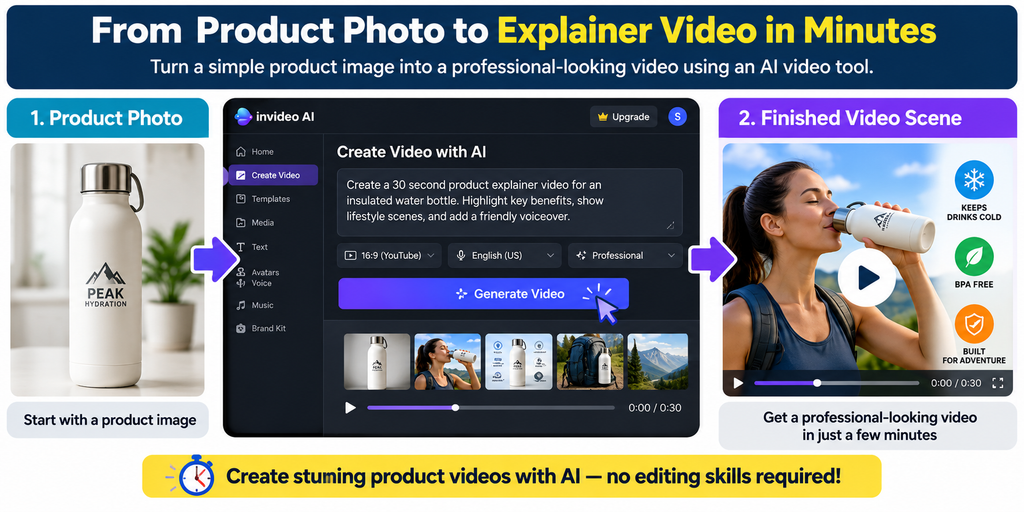
- Use an AI video tool: The fastest-growing option, and for most small businesses and solo marketers, the most practical. You describe or paste in your product, and AI handles the script-to-video conversion, avatar presenter, scene animation, and more — often in minutes instead of days.
If you want to go the AI route without juggling five different subscriptions (script writer, voiceover tool, avatar generator, music library, video editor), a bundle like BlueFX’s AI Media Machine packages all of it together.
Inside, tools like the Script-to-Video Generator turn a single product description into a finished video with voiceover and captions, the AI Cinematographer builds animated scenes from a product photo or idea, and the Talking AI Avatar tool gives you a spokesperson-style explainer without ever turning on a camera.
For anyone who doesn’t want to be on camera, hire actors, or learn animation software, it’s a straightforward way to go from script to finished explainer video in one sitting.
Whichever path you choose, keep your branding consistent: same colors, same logo placement, same tone throughout.
If you’d rather shoot some of this yourself, our guide on creating video content for small business without hiring a videographer covers the DIY filming side in more detail.
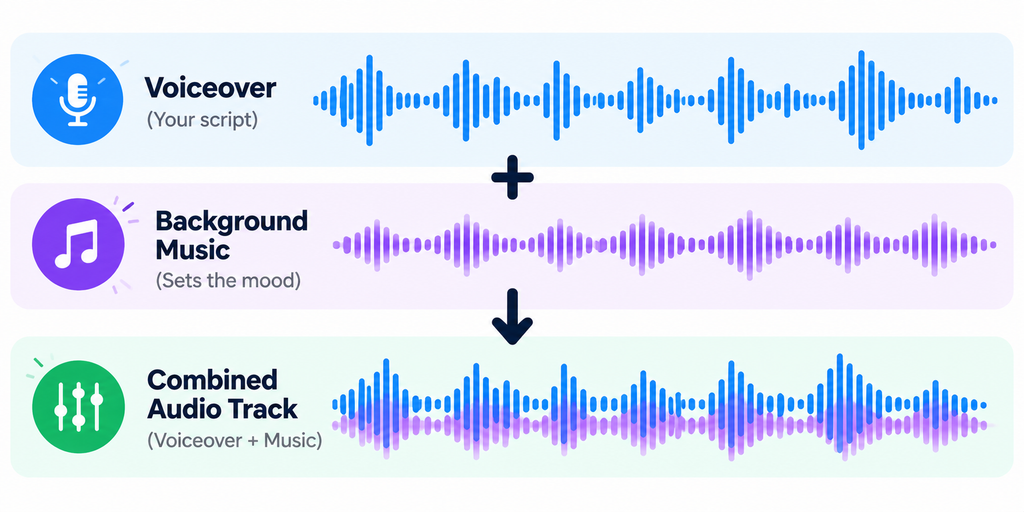
Step 6: Add Voiceover and Music That Match Your Brand
Your voiceover sets the tone of the entire video. A playful consumer app needs a different voice than a B2B compliance tool. A few quick guidelines:
- Match the voice’s energy to your brand (calm and professional vs. upbeat and casual)
- Keep pacing natural — not rushed, not robotic
- Use royalty-free or licensed music, kept quiet enough that it never competes with the voiceover
If you’re using an AI tool for your video, many bundles (including the one mentioned above) include a voiceover library with multiple tones plus a royalty-free music generator built in, so you’re not sourcing audio from three separate websites.
Step 7: Edit, Caption, and Polish
Once you have your visuals and audio, the editing pass is where the video actually comes together:
- Trim anything that doesn’t support your core message — explainer videos reward brevity
- Add captions. A large share of viewers watch with the sound off, especially on social media
- Keep transitions simple and consistent; flashy transitions distract from the message
- Add your logo and a clear end screen with your call to action
Step 8: Publish and Promote Your Explainer Video
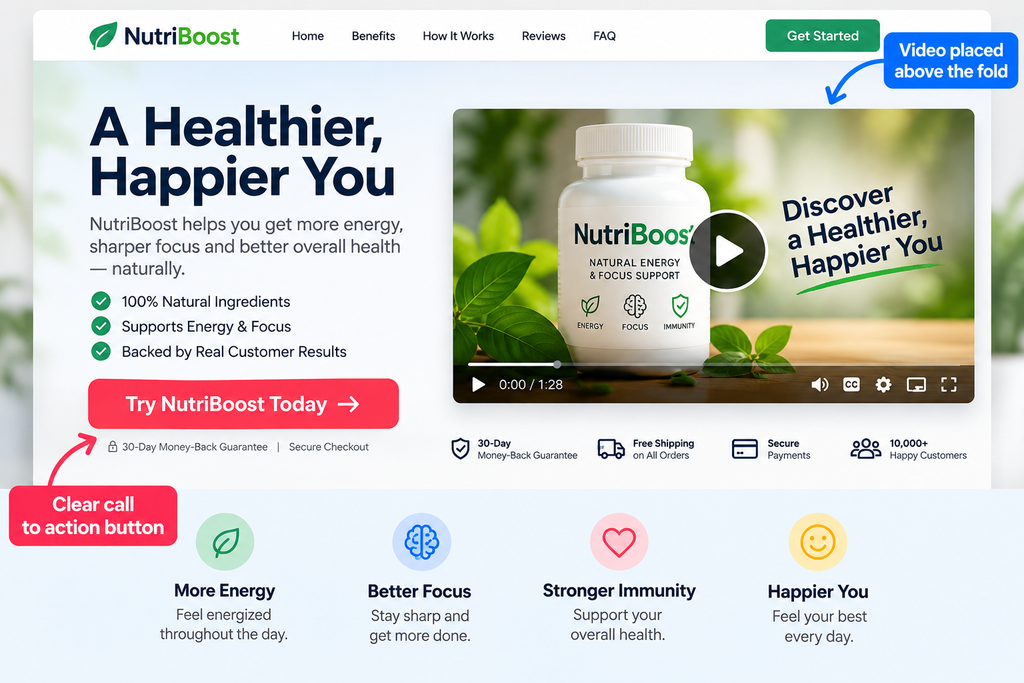
A great explainer video that nobody sees won’t move the needle. Place it where your audience already is:
- Above the fold on your homepage or landing page
- Embedded directly on the relevant product page
- As the first slide of your email welcome sequence
- Cut down into 15–30 second clips for social media and ads
For SEO, host the video on your own site (or embed it) alongside a text transcript — search engines can’t “watch” your video, but they can read the transcript and understand what it’s about. Adding video schema markup also helps your video show up as a rich result in Google search.
Common Mistakes to Avoid
- Trying to explain everything. One clear message beats five vague ones.
- Leading with features instead of benefits. Nobody cares about your tech stack; they care about what it does for them.
- Skipping the script and storyboard. Winging it almost always shows in the final cut.
- No clear call to action. Always tell the viewer exactly what to do next.
- Ignoring mobile and silent viewing. If it doesn’t work without sound, it’s not finished.
FAQs
Q. How long should a product explainer video be?
A. Most effective explainer videos run 60–90 seconds. Long enough to cover the hook, problem, solution, and call to action — short enough that people actually finish watching.
Q. Do I need a professional voice actor?
A.No. A clear, well-paced voiceover works fine, whether it’s recorded yourself or generated with an AI voiceover tool.
Q. What’s the cheapest way to make an explainer video?
A. An AI video tool is usually the lowest-cost option that still looks professional, since it replaces the need to hire a scriptwriter, voice actor, animator, and editor separately.
Q. Should I hire an agency instead?
A. Only if you need a highly polished, custom-animated video and have the budget and timeline for it. For most small businesses, an AI-assisted or DIY approach gets you 90% of the result for a fraction of the cost and time.
Final Thoughts
Learning how to create an explainer video for your product doesn’t require a production budget or a film degree. Nail the goal, write a tight script, pick a style that fits your product, and either DIY it, hire it out, or let an AI tool do the heavy lifting. Whichever path you choose, the video that actually gets made and published beats the “perfect” one that never ships.