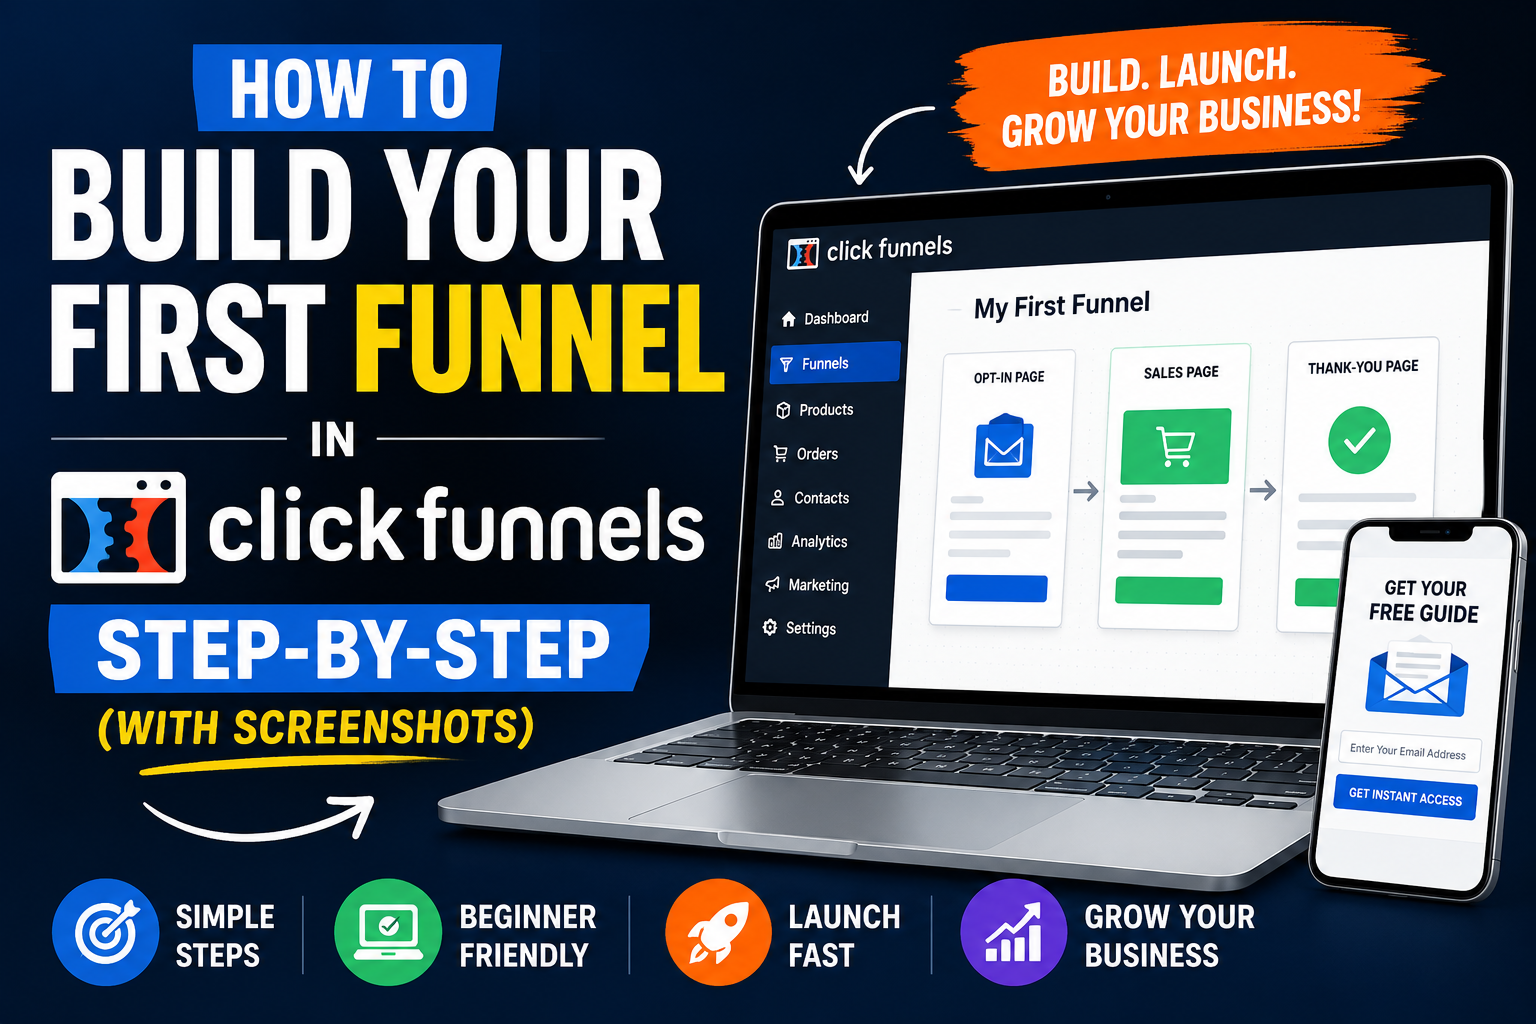
If you’re wondering how to build your first funnel in ClickFunnels, you’re in the right place. A sales funnel is simply a guided path that turns a stranger into a lead, and a lead into a paying customer — and ClickFunnels was built to make that process as simple as dragging and dropping a few pages together. You don’t need to know how to code, hire a designer, or piece together five different tools. In this guide, we’ll walk through the exact steps to go from a blank dashboard to a live funnel, so you can start collecting leads or making sales today.
Table of Contents
What Is a Sales Funnel (And Why You Need One)
Before jumping into the builder, it helps to understand what you’re actually creating. A sales funnel is a series of pages designed to move a visitor toward one specific action — signing up, booking a call, or buying a product. Unlike a regular website, where visitors can click anywhere and get distracted, a funnel keeps them on a single path with one goal per page.
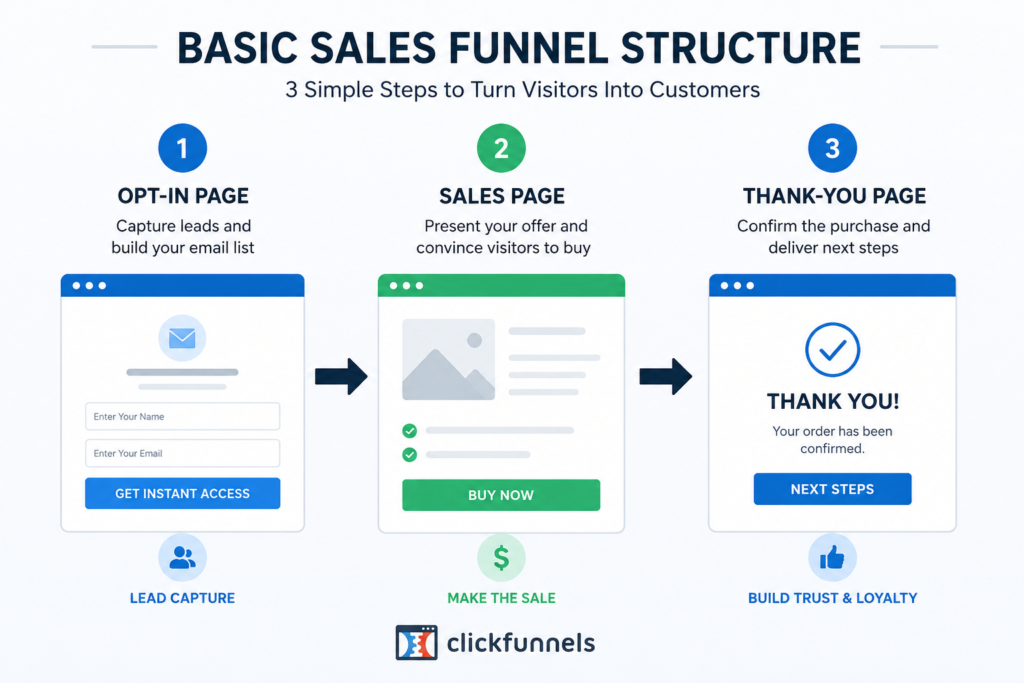
A basic funnel usually includes:
- An opt-in or landing page – where visitors give you their email in exchange for something valuable (a free guide, checklist, or discount)
- A sales or offer page – where you present your product or service
- A thank-you or upsell page – where you confirm the purchase and optionally offer a related product
Step 1: Set Up Your ClickFunnels Account
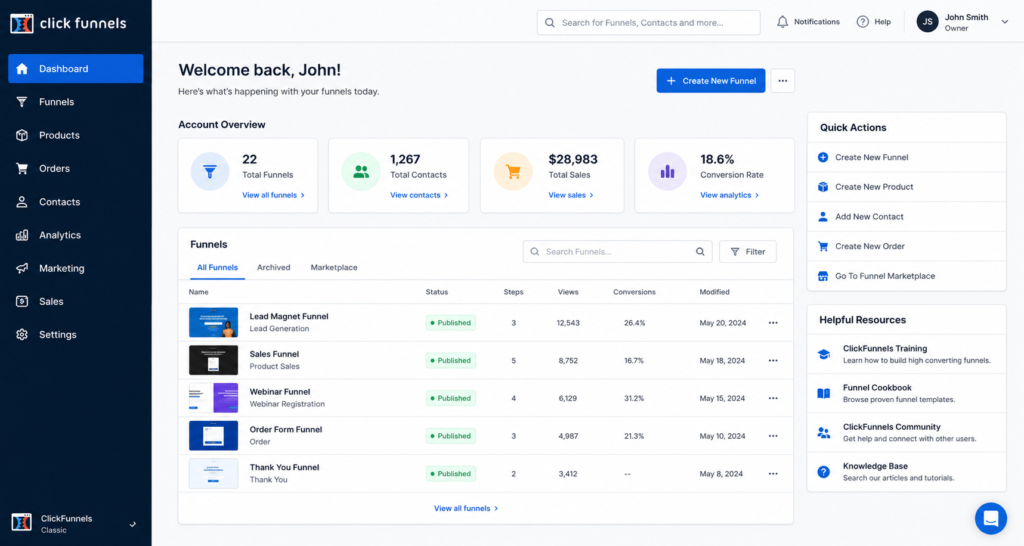
Head to ClickFunnels and create an account if you haven’t already. Once you’re logged in, you’ll land on the main dashboard, which is your control center for building, editing, and tracking every funnel you create.
Take a moment to explore the sidebar — this is where you’ll find your funnels, contacts, products, and settings as you grow.
Step 2: Click “Create New Funnel”
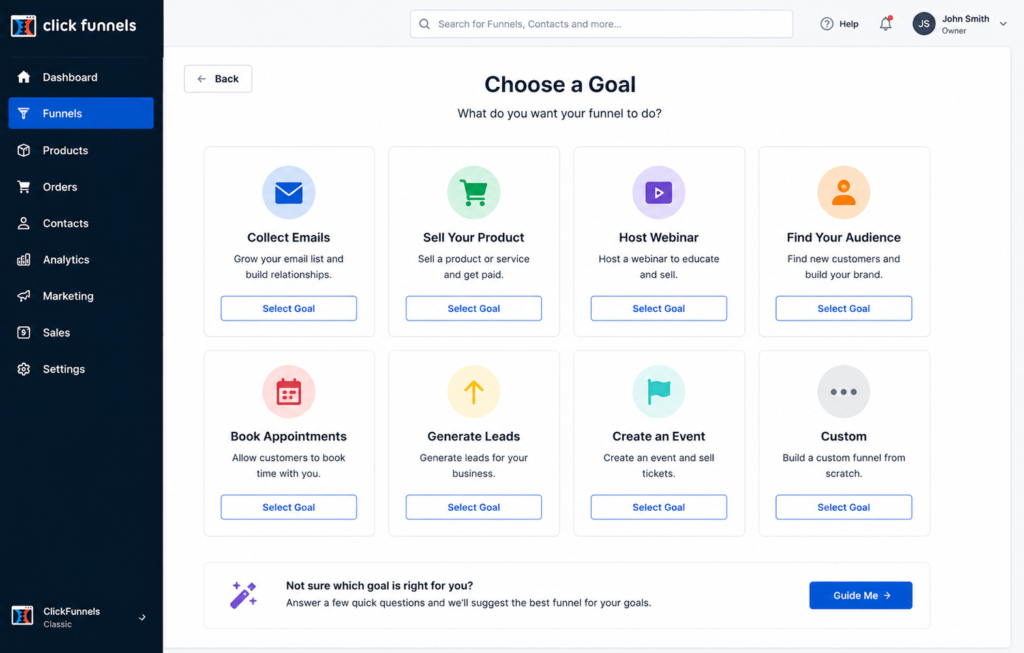
From the dashboard, click the button to build a new funnel. ClickFunnels will ask you to choose a goal for your funnel — this could be to collect emails, sell a product, or host a webinar. Pick the goal that matches what you’re trying to achieve.
For most beginners, starting with a Lead Funnel (collecting emails in exchange for a free resource) is the easiest way to get comfortable with the platform before moving on to a sales funnel.
Step 3: Name Your Funnel and Choose a Template
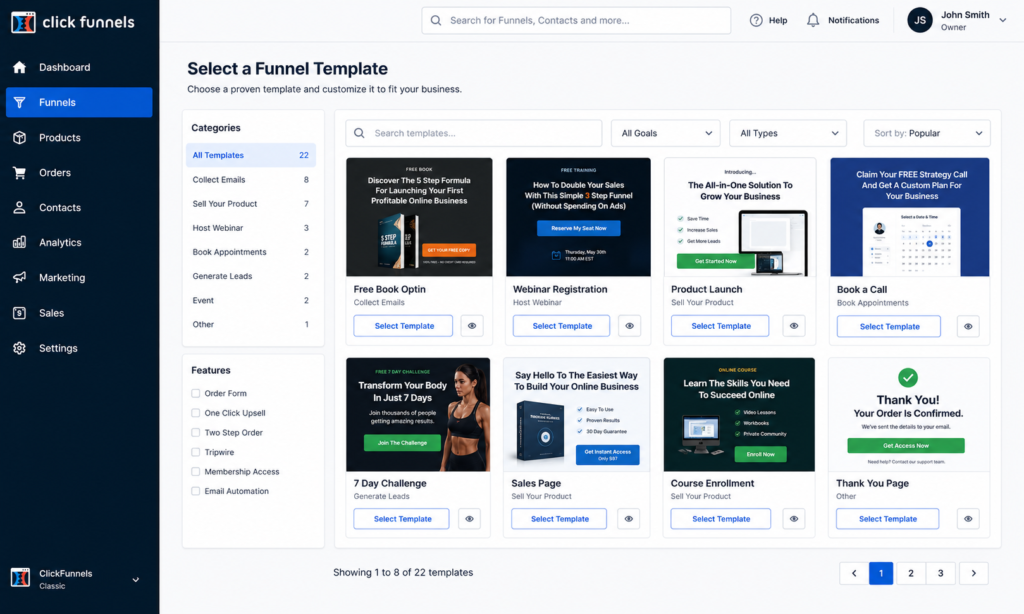
Next, give your funnel a clear, descriptive name — something like “Free Checklist Opt-In” — so you can find it easily later. Then browse the template library and pick a design that matches the tone of your offer.
Templates handle all the heavy lifting: layout, color scheme, and structure are already done for you. All you need to do is swap in your own text, images, and offer.
Step 4: Customize Your Pages in the Editor
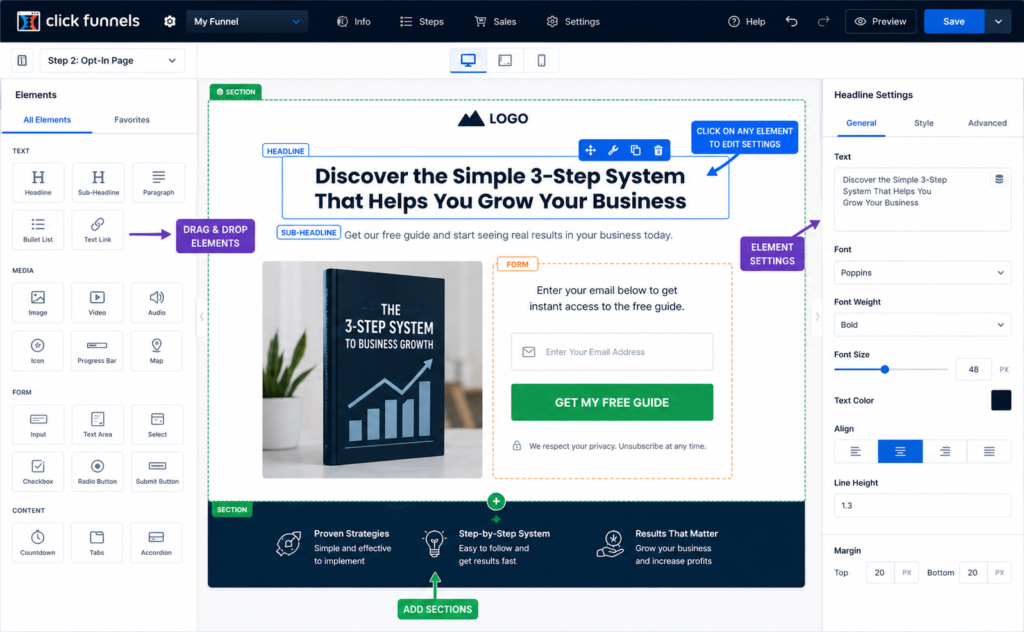
Once your template is selected, click Edit Page to open the drag-and-drop editor. This is where your funnel starts to come to life. Everything on the page — headlines, images, buttons, opt-in forms — is built from movable sections and elements, so you can click on anything and change it.
A few things to focus on while editing:
- Headline: Make it clear and benefit-driven. Visitors should know exactly what they’re getting within 3 seconds.
- Opt-in form: Keep it short — usually just a name and email field converts best.
- Call-to-action button: Use action words like “Get My Free Guide” instead of a generic “Submit.”
- Images: Replace placeholder images with your own branding or product photos.
Step 5: Connect Your Domain and Email Integration
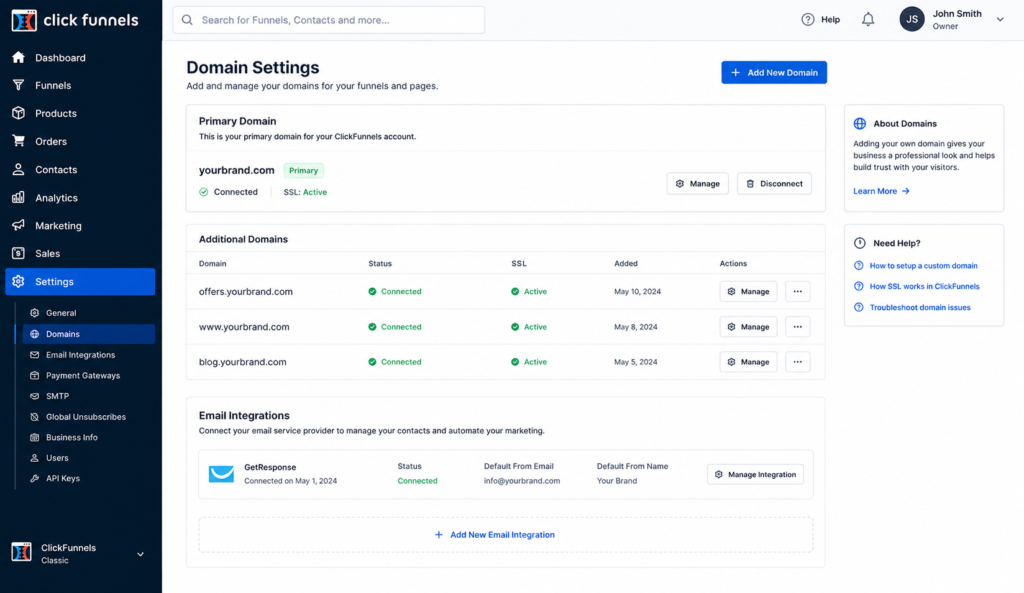
Before your funnel can go live, you’ll want to connect a custom domain (or use a ClickFunnels subdomain to start) and link your email marketing tool so new leads are automatically added to your list. ClickFunnels integrates with most major email providers, so this usually takes just a couple of clicks under the Integrations settings.
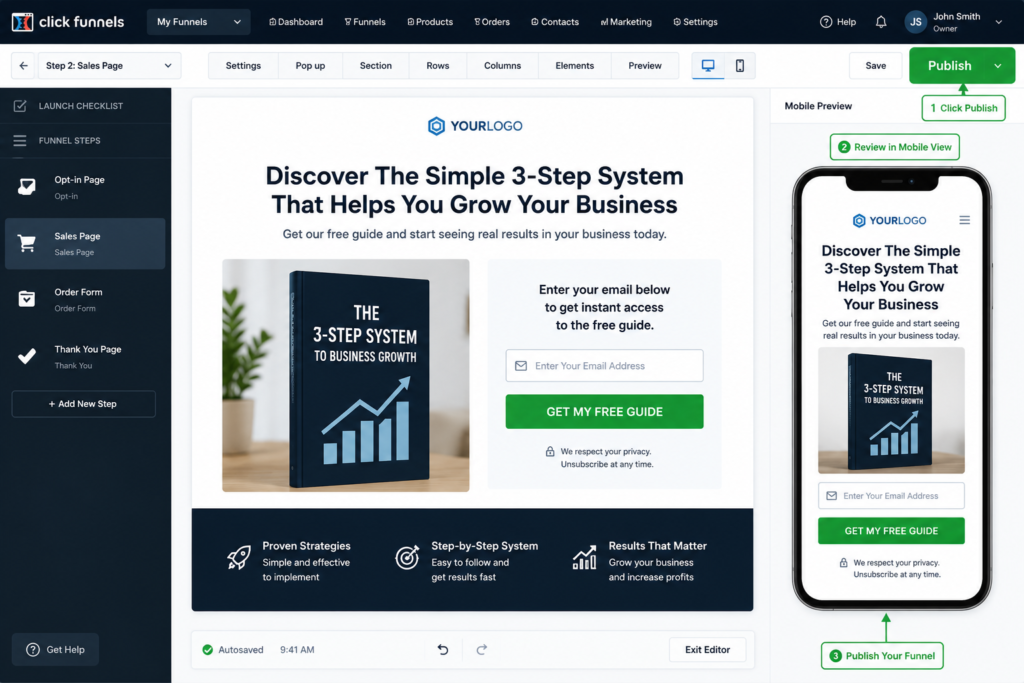
Step 6: Preview and Publish Your Funnel
Once your pages are customized, use the Preview button to check how everything looks on both desktop and mobile. Funnels are frequently viewed on phones, so this step matters more than most beginners realize.
When everything looks right, hit Publish. Your funnel is now live and ready to start collecting leads or sales.
Step 7: Test the Funnel Yourself
Before sending any traffic to it, walk through your own funnel as if you were a visitor. Submit the opt-in form, check that you receive the confirmation email, and click through every button to make sure nothing is broken. Catching a typo or a dead link now saves you from losing leads later.
Common Mistakes to Avoid When Building Your First Funnel
- Too many choices on one page – every page should have one goal and one call-to-action
- Skipping mobile preview – a funnel that looks great on desktop can break on mobile
- Overcomplicating the first funnel – start simple, then add upsells and automation once you understand the basics
- Ignoring your headline – it’s the first (and sometimes only) thing visitors read

Final Thoughts
Now that you know how to build your first funnel in ClickFunnels, the best next step is simply to build one. Start small, keep your first funnel simple, and improve it over time as you learn what your audience responds to. The platform is designed so that even total beginners can go from idea to live funnel in a single afternoon.
Ready to Build Your First Funnel? Try ClickFunnels Risk-Free
The easiest way to actually learn ClickFunnels is to get inside it and start building. Right now, you can try ClickFunnels for 3 months for just $99, giving you full access to the funnel builder, templates, and integrations covered in this guide — without committing to a full-price plan.
👉 Start Your ClickFunnels 3-Month Trial for $99
Build your first funnel today and see for yourself how quickly you can turn visitors into leads and customers.
Affiliate Disclosure: This article may contain affiliate links. If you purchase through these links, I may earn a commission at no additional cost to you. I only recommend tools and platforms I believe can provide value to my readers.